Energy-Saving Attic Upgrades That Protect Your Roof Year-Round
Reading time: 12 minutes
Here’s a question most homeowners never think to ask: Why is your energy bill highest during the months when your roof is under the most stress? The answer lives directly above your ceiling — in your attic. That largely ignored space between your living area and your shingles is quietly determining both your monthly utility costs and the long-term health of your entire roofing system.
In 2026, with residential energy costs having climbed an average of 18% compared to 2022 levels according to the U.S. Energy Information Administration, the case for attic upgrades has never been more compelling. And here’s what most roofing guides won’t tell you: the same improvements that slash your heating and cooling bills also dramatically extend the life of your roof. It’s one investment that solves two expensive problems simultaneously.
Whether you’re dealing with ice dams in January, a sweltering attic in July, or a roof that seems to age faster than it should, this guide will walk you through the precise upgrades that make a measurable difference — and show you exactly why they work.
Table of Contents
- Why Your Attic Is the Key to Roof Longevity
- Insulation: The Foundation of Every Attic Upgrade
- Ventilation Systems That Work With Your Insulation
- Air Sealing: The Overlooked Energy Multiplier
- Radiant Barriers and Reflective Systems
- Comparing Upgrade Options: A Data-Driven Look
- Real-World Results: Two Homeowner Scenarios
- Common Challenges and How to Overcome Them
- Frequently Asked Questions
- Your Attic Upgrade Action Plan
Why Your Attic Is the Key to Roof Longevity
Most people think about their roof as a standalone system — shingles, underlayment, decking. But roofing professionals understand something the average homeowner doesn’t: the attic environment directly controls roof deck temperature, moisture levels, and structural stress. An improperly managed attic can reduce a 30-year shingle warranty to real-world performance of 15–18 years.
Here’s the core problem. In summer, an unventilated or poorly insulated attic can reach temperatures between 140°F and 160°F. That extreme heat bakes asphalt shingles from the underside, accelerating granule loss and causing premature curling. In winter, warm air leaking from your conditioned living space into the attic creates uneven roof surface temperatures — the exact conditions that generate ice dams along your eaves.
“The number one cause of premature roof failure we see in the field isn’t storm damage or poor installation — it’s thermal and moisture stress caused by an uncontrolled attic environment.” — Marcus Delgado, Certified Roofing Contractor and NRCA member, 2025 National Roofing Industry Summit
The financial stakes are real. According to the 2025 HomeAdvisor National Cost Report, replacing a standard asphalt shingle roof on a 2,000 sq ft home now averages $14,200–$19,800. A comprehensive attic upgrade, by contrast, typically runs $3,500–$8,000 — and it extends your roof’s life while simultaneously cutting your energy bills. The math is straightforward.
The Three Attic Enemies Working Against You
Before diving into solutions, let’s name the specific problems your upgrades need to address:
- Excessive heat accumulation — Degrades roofing materials and increases cooling load
- Moisture infiltration and condensation — Causes wood rot, mold, and structural damage
- Uncontrolled air movement — Drives heat loss in winter and heat gain in summer
Every upgrade recommendation in this article directly targets at least one of these three enemies. That’s the strategic framework that makes attic improvements so effective — you’re not just adding insulation, you’re systematically eliminating the conditions that shorten roof life and raise energy bills.
Insulation: The Foundation of Every Attic Upgrade
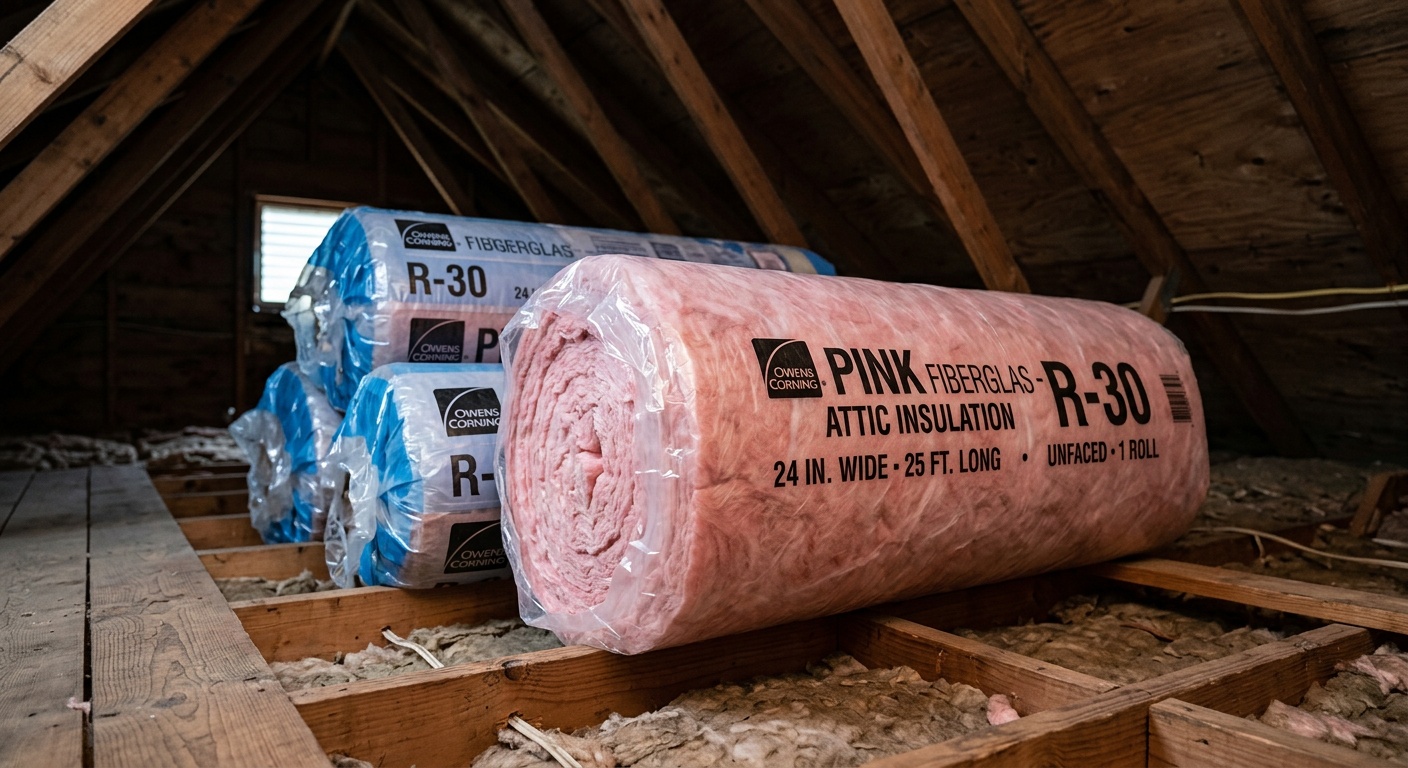
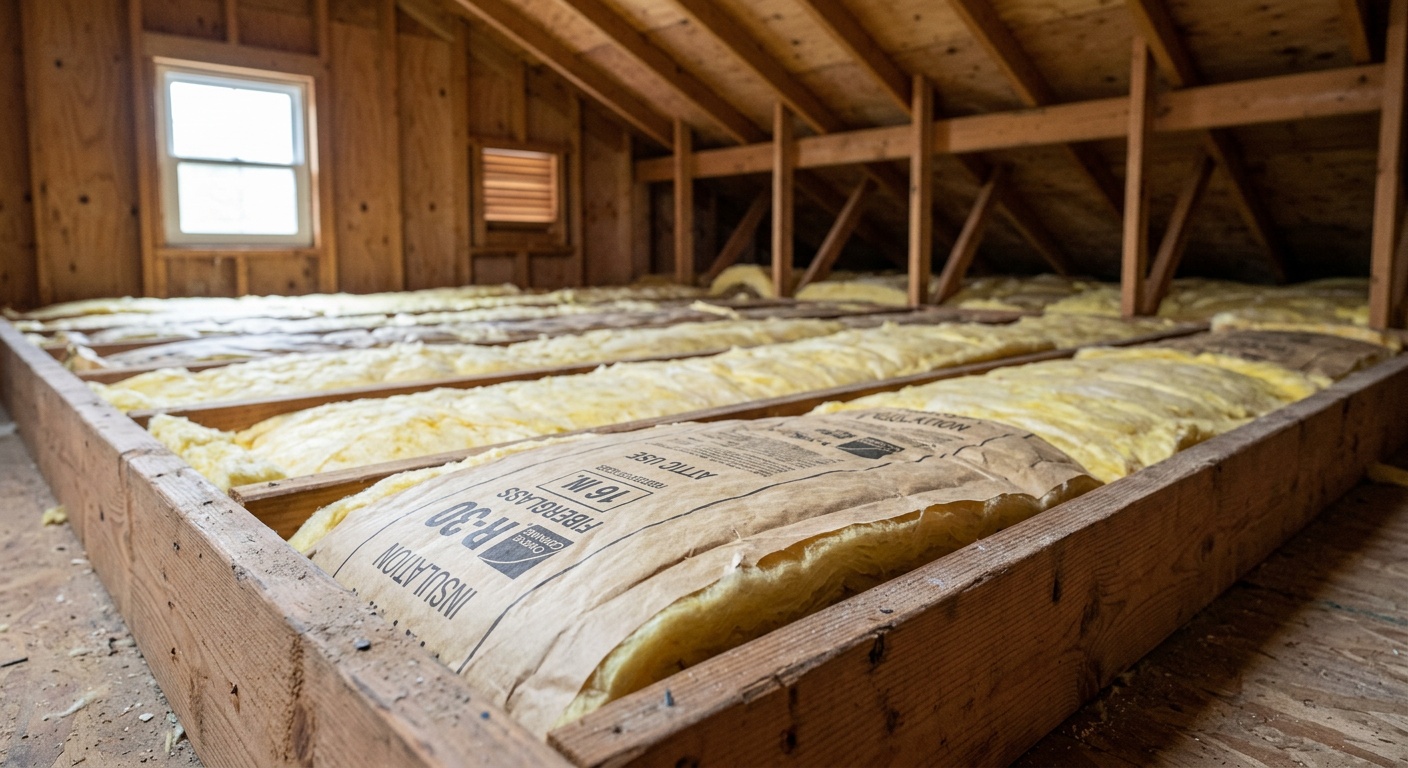
If attic upgrades were a recipe, insulation would be the primary ingredient. It’s the most impactful single change you can make, and it directly affects both energy efficiency and roof protection. But not all insulation is created equal, and the installation method matters as much as the product itself.
Understanding R-Value in 2026
R-value measures thermal resistance — the higher the number, the better the insulation performs. The U.S. Department of Energy updated its climate zone recommendations in late 2024, and as of 2026, the guidelines for attic insulation are as follows:
- Zones 1–2 (Southern states, Florida, coastal Gulf): R-30 to R-49
- Zones 3–4 (Mid-Atlantic, Pacific Northwest, Midwest): R-38 to R-60
- Zones 5–8 (Northern states, mountain regions, Alaska): R-49 to R-60+
Here’s a critical point that many contractors gloss over: adding insulation to an attic that already has some is often as important as starting from scratch. A 2024 study by Oak Ridge National Laboratory found that 72% of U.S. homes with existing attic insulation were under-insulated relative to current DOE standards. If your home was built before 2005, there’s a strong probability you fall into this category.
Comparing Insulation Types for Attic Applications
Blown-in cellulose is currently the most popular choice for retrofitting existing attics. Made from recycled paper treated with borate for fire and pest resistance, it settles into irregular spaces effectively, costs $1.20–$2.00 per square foot installed, and achieves R-3.7 per inch. It’s particularly good at filling gaps around joists and blocking.
Blown-in fiberglass offers similar coverage with an R-value of approximately R-2.5 per inch. It’s slightly less expensive than cellulose in most markets and doesn’t settle as much over time, but it requires more depth to achieve the same total R-value. It’s also better in high-humidity environments since it doesn’t absorb moisture the way cellulose can.
Spray polyurethane foam (SPF) is the premium option. Closed-cell spray foam achieves R-6.5 to R-7 per inch and simultaneously serves as an air barrier — a significant advantage we’ll return to in the air sealing section. It’s most effective when applied to the roof deck (creating a conditioned attic) rather than the attic floor, and it costs $3.00–$5.50 per square foot installed. For new construction or major renovations, it’s increasingly the professional’s first choice.
Pro Tip: Before adding any insulation, have a building performance contractor conduct a blower door test. This identifies where air is actually leaking, so you seal those points before insulating — a sequence that makes both upgrades dramatically more effective than doing either alone.
Ventilation Systems That Work With Your Insulation
Here’s where many well-intentioned homeowners make a critical mistake: they add insulation without addressing ventilation, and end up making things worse. Proper attic ventilation isn’t about introducing cold air — it’s about maintaining a continuous, balanced airflow that keeps the attic close to outdoor temperature.
The standard ventilation formula, as specified by most building codes including the 2021 International Residential Code (still widely adopted in 2026), calls for 1 square foot of net free ventilation area for every 150 square feet of attic floor space — or 1:300 if you have a balanced system with both soffit and ridge venting.
The Balanced Ventilation System
A properly designed ventilation system works through natural convection — cool air enters through soffit vents at the eaves, flows along the underside of the roof deck, picks up heat, and exits through ridge vents at the peak. This wash of air does two enormously important things simultaneously:
- In summer: It removes accumulated heat, keeping the roof deck cooler and reducing your cooling load
- In winter: It keeps the roof deck uniformly cold, preventing the uneven temperatures that create ice dams
The 2026 market offers several ventilation upgrades worth knowing:
High-performance ridge vents with external baffles have become the standard recommendation among building scientists. Products like the Cor-A-Vent SV-5 and the GAF Cobra Ridge Runner provide significantly better airflow than basic open-slot ridge vents, particularly in low-wind conditions.
Baffles (also called rafter vents or wind baffles) are installed between rafters at the eaves to maintain the ventilation channel when blown-in insulation is added. Without them, insulation can block soffit vents — defeating the entire system. If you’re adding blown-in insulation, baffles are non-negotiable.
Solar-powered attic fans have improved dramatically in efficiency and cost-effectiveness. By 2026, units with integrated lithium backup batteries can operate overnight to clear heat accumulated during the day. They’re most valuable in climates where natural convection alone is insufficient — particularly in very hot, low-slope roof situations.
Air Sealing: The Overlooked Energy Multiplier
If insulation is the foundation of attic efficiency, air sealing is the hidden multiplier that makes everything else work better. According to the EPA’s ENERGY STAR program, air sealing combined with insulation can reduce heating and cooling costs by 10–20% compared to insulation alone — a finding confirmed repeatedly in field studies through 2025.
The principle is simple: warm air rises. In winter, conditioned air from your living spaces constantly tries to escape into the attic through every gap, crack, and penetration. These bypasses include:
- Top plates of interior walls (often the largest air pathway in older homes)
- Electrical boxes, light fixtures, and junction boxes
- Plumbing and HVAC penetrations
- Pull-down attic stairs (a notoriously bad air leakage point)
- Attic hatch frames
- Recessed lighting cans (older IC-rated and non-IC-rated fixtures)
Sealing these bypasses before insulating is the correct sequence. Using fire-rated caulk, low-expansion spray foam, and rigid foam insulation cut-to-size, a thorough air sealing job typically takes a skilled contractor 4–8 hours in an average attic. The cost runs $500–$1,500 depending on attic complexity and local labor rates.
“We’ve seen homes where air sealing alone reduced heating costs by 15% in the first winter. Combined with proper insulation, the cumulative savings often exceed the project cost within three years.” — Dr. Lena Hovarth, Building Science Research Fellow, Lawrence Berkeley National Laboratory, 2025
Quick Scenario: Imagine a 1978 ranch home in central Ohio. The attic has 4 inches of old fiberglass batts — well below current Zone 5 recommendations. Every winter, the homeowners run their furnace constantly but the house never feels truly warm. Why? Air sealing assessment reveals the top plates of every interior wall are completely open to the attic, acting as warm air chimneys. Sealing those top plates and adding blown-in cellulose to R-49 cuts their heating bill by 23% and eliminates the cold-floor problem that’s plagued them for years. That’s the power of addressing both issues together.
Radiant Barriers and Reflective Systems
In hot climates — roughly IECC zones 1 through 3, covering Florida, Texas, the Gulf Coast, Arizona, and southern California — radiant barriers are a compelling addition to the insulation and ventilation package. They work on an entirely different principle: instead of slowing heat conduction (insulation’s job), they reflect radiant heat before it enters the attic space.
A radiant barrier is typically a thin sheet of highly reflective aluminum foil, either attached to a substrate or applied directly to the underside of the roof decking. The Florida Solar Energy Center has documented consistent cooling energy savings of 8–12% in properly installed applications — with higher savings in homes that have ducts running through the attic.
For northern climates, radiant barriers provide minimal benefit for heating costs and are generally not recommended as a standalone investment. However, reflective insulation products that combine an air bubble layer with reflective facings can be useful as part of a broader upgrade package in any climate.
Important nuance: Radiant barriers only work when they face an air space. If covered with insulation or installed flush against a surface, they lose their effectiveness entirely. This is why professional installation matters — improper placement is surprisingly common in DIY applications.
Comparing Upgrade Options: A Data-Driven Look
| Upgrade Type | Avg. Cost (2,000 sq ft home) | Energy Savings | Roof Life Impact | Payback Period |
|---|---|---|---|---|
| Blown-In Insulation (to R-49) | $1,800–$3,200 | 12–18% | Moderate positive | 3–5 years |
| Air Sealing (comprehensive) | $500–$1,500 | 10–20% | Moderate positive | 2–4 years |
| Balanced Ventilation System | $800–$2,400 | 5–10% | High positive | 4–6 years |
| Spray Foam (conditioned attic) | $4,500–$9,000 | 25–40% | Very high positive | 6–10 years |
| Radiant Barrier (hot climates) | $1,200–$2,500 | 8–12% cooling | Moderate positive | 4–7 years |
Estimated Annual Energy Savings by Upgrade (Percentage of HVAC Costs)
Real-World Results: Two Homeowner Scenarios
Case Study 1: The Minnesota Ice Dam Problem
In February 2025, Sandra and Tom Eriksson of Eden Prairie, Minnesota faced a homeowner’s nightmare: water stains spreading across their dining room ceiling despite no visible roof damage. A roofing inspector identified severe ice dam formation along the eaves — a consequence of an attic with only R-19 insulation and completely blocked soffit vents.
Their attic upgrade included: comprehensive air sealing of all top plates and penetrations ($850), installation of rafter baffles to restore soffit ventilation ($400), and blown-in cellulose to R-60 ($2,900). Total investment: $4,150.
The results in their first full winter (2025–2026): zero ice dam formation, a 21% reduction in heating costs (approximately $380 annually at current Minnesota natural gas rates), and complete elimination of the ceiling water intrusion. Their roofing contractor, who had previously quoted a $3,200 roof repair for ice dam damage, noted that the attic upgrade was “the single most important thing they could have done for that roof’s long-term survival.”
Case Study 2: The Arizona Heat Problem
In Phoenix, David Reyes purchased a 1995 ranch home in early 2025. His first summer electric bill arrived at $380 — uncomfortably high even by Arizona standards. An energy audit revealed: no radiant barrier, R-19 attic insulation (vs. the recommended R-38 for Zone 2), and a severely undersized ridge vent.
The upgrade package: radiant barrier foil installed on the underside of roof decking ($1,800), blown-in fiberglass to R-38 ($2,200), and ridge vent replacement with a high-performance baffled vent ($600). Total: $4,600, partially offset by a $1,200 Arizona Public Service rebate available in 2026 for qualifying insulation upgrades.
His first full summer electric bill dropped to $261 — a 31% reduction. At current APS rates, the annualized cooling savings of approximately $720 put his net payback period at under five years. His roof deck temperature readings in June 2026 showed a 28°F reduction compared to pre-upgrade measurements — a change that could add 5–8 years to his shingle life according to the manufacturer’s thermal performance guidelines.
Common Challenges and How to Overcome Them
Challenge 1: Accessing a Difficult or Cramped Attic
Many homes — particularly those built in the 1950s through 1970s — have attic access hatches that are too small for comfortable work, or cathedral ceiling sections that leave no accessible attic space at all. This is a real constraint, not an excuse.
Solutions: For blown-in insulation in tight spaces, professional crews use flexible hose extensions that can reach deep into confined areas from a single access point. For air sealing in areas you can’t physically reach, endoscopic cameras combined with long-nozzle spray foam applicators have become standard tools in the building performance industry. For cathedral ceilings with no accessible attic, the most effective upgrade is typically blown-in insulation through holes drilled in the roof deck (covered with plugs and new shingles) or through the interior ceiling — a more disruptive but highly effective method.
Challenge 2: Balancing Ventilation and Insulation in Older Homes
Older homes frequently have soffit soffits that are either solid wood (no ventilation at all) or have had ventilation openings blocked by decades of insulation settling and pest screening degradation. Adding insulation to an under-ventilated attic can actually trap moisture and worsen conditions.
Solutions: Always assess and upgrade ventilation before or simultaneously with insulation. If existing soffits are solid, continuous perforated soffit vent strips can be installed during the project — typically $8–$15 per linear foot installed. Some contractors also use over-fascia vents that install at the top of the fascia board, bypassing the soffit entirely.
Challenge 3: Navigating 2026 Incentive Programs
The Inflation Reduction Act’s residential energy efficiency tax credits remain in place through 2032, providing a 30% tax credit on qualifying insulation and air sealing improvements — capped at $1,200 per year for insulation materials. Many utilities and states offer additional rebates. The challenge in 2026 is that program specifics vary significantly by location and have been updated multiple times since 2022.
Solutions: Use the ENERGY STAR Rebate Finder (energystar.gov/rebate-finder) for current utility rebates in your ZIP code. Consult a certified energy auditor who can document improvements in a format that satisfies both utility and federal tax credit requirements — this documentation is often the difference between a successful credit claim and a rejected one.
Frequently Asked Questions
How do I know if my current attic insulation needs upgrading?
The simplest field test: if you can see your attic floor joists above the insulation level, you almost certainly need more — current standards require insulation to cover the joists and extend well above them. For a more precise assessment, measure the depth of existing insulation and look up your climate zone’s recommended R-value on the DOE’s energy.gov website. If your home was built before 2000 and hasn’t had an attic upgrade, a professional energy audit (which qualifies for the 30% federal tax credit in 2026) will give you a comprehensive baseline.
Will attic upgrades void my roofing warranty?
In most cases, no — but there are nuances. Standard blown-in insulation and air sealing work performed below the roof deck won’t affect shingle warranties. However, spray foam applied directly to the roof deck (creating a conditioned attic) can void manufacturer warranties if not performed in accordance with their guidelines. Before choosing the conditioned attic approach, contact your shingle manufacturer’s technical support line and document their response. Many manufacturers — including GAF, CertainTeed, and Owens Corning — now have explicit guidelines for spray foam applications that, when followed, preserve warranty coverage.
Can I do attic air sealing and insulation as a DIY project?
Air sealing is genuinely DIY-accessible for homeowners comfortable working in confined spaces — caulk, low-expansion foam, and rigid foam board are straightforward materials. The critical safety requirements: proper respiratory protection (N95 minimum, P100 preferred), Tyvek suit, and goggles are essential in attic environments. Blown-in insulation is technically DIY-possible — rental equipment is available at major home improvement stores — but achieving consistent depth across irregular joist bays is harder than it looks, and under-insulated sections can create thermal bridging problems that undermine the whole project. For the best results on insulation, professional installation is worth the premium, especially when you factor in the warranty documentation needed for tax credit purposes.
Your Attic Upgrade Action Plan
You’ve now got the strategic framework that most homeowners never have access to. Let’s turn it into concrete next steps you can act on this month.
Here’s your practical roadmap:
- Schedule a professional energy audit (Week 1–2): Start with a blower door test and thermal imaging assessment. This tells you exactly where air is leaking and what your current insulation levels are — no guesswork, no wasted money. Cost: $300–$500, partially offset by federal tax credits.
- Prioritize air sealing before insulation (Week 3–4): Using your audit results, address the top air leakage points first. This is typically the highest ROI action in the entire project. Doing it before insulating means you’re not disturbing new material to fix the bypasses afterward.
- Upgrade insulation to your climate zone’s current standard (Month 2): Get three quotes from BPI-certified contractors. Confirm they’ll document the upgrade for both utility rebates and federal tax credit qualification.
- Assess and upgrade ventilation simultaneously: Confirm your soffit-to-ridge ventilation ratio meets the 1:300 standard. Replace any blocked soffit vents or undersized ridge vents as part of the same project mobilization to save on labor costs.
- Add climate-specific upgrades (if applicable): Radiant barrier for hot climates, solar attic fans for low-slope roofs in high-heat regions, or additional moisture management for humid climates.
As energy codes continue tightening and climate patterns push heating and cooling systems harder than ever, the homes that hold their value and avoid premature roofing expenses will be those with properly managed attic systems. This isn’t a trend — it’s the direction the entire building science industry has been moving for a decade, and 2026 marks a point where the technology, the incentives, and the contractor expertise have all matured enough to make these upgrades more accessible and effective than ever before.
The real question isn’t whether you can afford to upgrade your attic — it’s whether you can afford not to. Every month you wait is another month of paying more for energy and shortening the life of a roof that cost you tens of thousands of dollars. Your attic upgrade is waiting. What’s the first step you’ll take this week?