Upper Floor Heat Problems Caused by Inadequate Roof Insulation
Reading time: 12 minutes
You walk upstairs on a summer afternoon and it hits you — a wall of stifling heat that makes the upper floor feel more like a sauna than a living space. Sound familiar? Or maybe it’s winter, and no matter how high you crank the thermostat, the bedrooms upstairs never quite warm up while your heating bills keep climbing. If either scenario resonates, there’s a strong chance your roof insulation is the silent culprit working against your comfort and your wallet.
Inadequate roof insulation is one of the most underdiagnosed problems in residential buildings, yet it’s responsible for some of the most dramatic temperature imbalances homeowners experience. In 2026, with energy costs continuing to rise and climate-driven temperature extremes becoming more common, fixing this issue has never been more financially and practically important.
This guide will walk you through exactly what’s happening above your ceiling, why it matters more than ever, and — most importantly — what you can do about it today.
Table of Contents
- Why Upper Floors Overheat: The Science Behind the Problem
- Warning Signs Your Roof Insulation Is Failing You
- Real-World Impact: Case Studies and Energy Cost Data
- Insulation Types Compared: Which One Is Right for Your Roof?
- Heat Loss by Insulation Level: A Visual Breakdown
- Practical Solutions and How to Implement Them
- Frequently Asked Questions
- Your Cooler Home Awaits: A 5-Step Action Roadmap
Why Upper Floors Overheat: The Science Behind the Problem
Heat is relentless. It always moves from warmer areas to cooler ones, and in summer, your roof absorbs an enormous amount of solar radiation. A dark-colored roof surface can reach temperatures of 150°F to 185°F (65°C to 85°C) on a hot day. Without adequate insulation acting as a thermal barrier, that heat conducts straight through the roof deck and into your attic — and then radiates down into your upper-floor living spaces.
This phenomenon is known as radiant heat transfer, and it operates alongside two other forces: conduction (heat moving through solid materials) and convection (warm air rising and accumulating). Together, these three processes create the perfect storm of discomfort on your upper floor.
The Stack Effect: Why Heat Loves Your Upper Floor
There’s a concept in building science called the stack effect. Warm air naturally rises. When your living spaces generate heat — from appliances, body heat, sunlight through windows — it migrates upward. At the same time, hot air from your attic presses down through ceiling cracks, light fixtures, and poorly sealed penetrations. Your upper floor is essentially sandwiched between rising warm air from below and baking heat from above.
In winter, the stack effect works against you in a different way: warm air from your heated interior escapes rapidly through an uninsulated or under-insulated roof, creating cold upper floors and dramatically inflated heating bills. According to the U.S. Department of Energy’s 2025 Residential Energy Efficiency Report, heat loss through roofs and attics accounts for approximately 25–30% of total home heating energy loss in homes built before 2000.
The Attic as a Heat Battery
Think of your attic as a massive thermal battery. When your roof insulation is insufficient — say, an R-value of R-11 when your climate zone recommends R-38 or higher — your attic doesn’t just get warm, it stores that heat and releases it slowly, even after the sun goes down. This is why upper floors often remain uncomfortably warm late into the evening, long after outdoor temperatures have dropped.
In 2026, the International Energy Conservation Code (IECC) recommends attic insulation R-values ranging from R-30 to R-60 depending on climate zone, yet the National Association of Home Inspectors estimates that nearly 45% of homes in the United States still have attic insulation levels below current recommendations. This is a massive, largely invisible problem sitting just above millions of ceilings.
Warning Signs Your Roof Insulation Is Failing You
Before you invest a dollar in solutions, you need to confirm that roof insulation is actually your problem. Here are the definitive warning signs:
- Temperature differential greater than 5°F between floors: A consistent 8–12°F difference between your ground floor and upper floor in summer is a red flag.
- Ice dams forming on your roof in winter: These occur when heat escaping through an under-insulated roof melts snow, which then refreezes at the eaves.
- HVAC running constantly without reaching target temperature upstairs: Your system works harder than it should, and the upper floor still doesn’t get comfortable.
- High energy bills that spike disproportionately in summer and winter: Unexplained seasonal spikes often trace back to thermal inefficiency at the roof level.
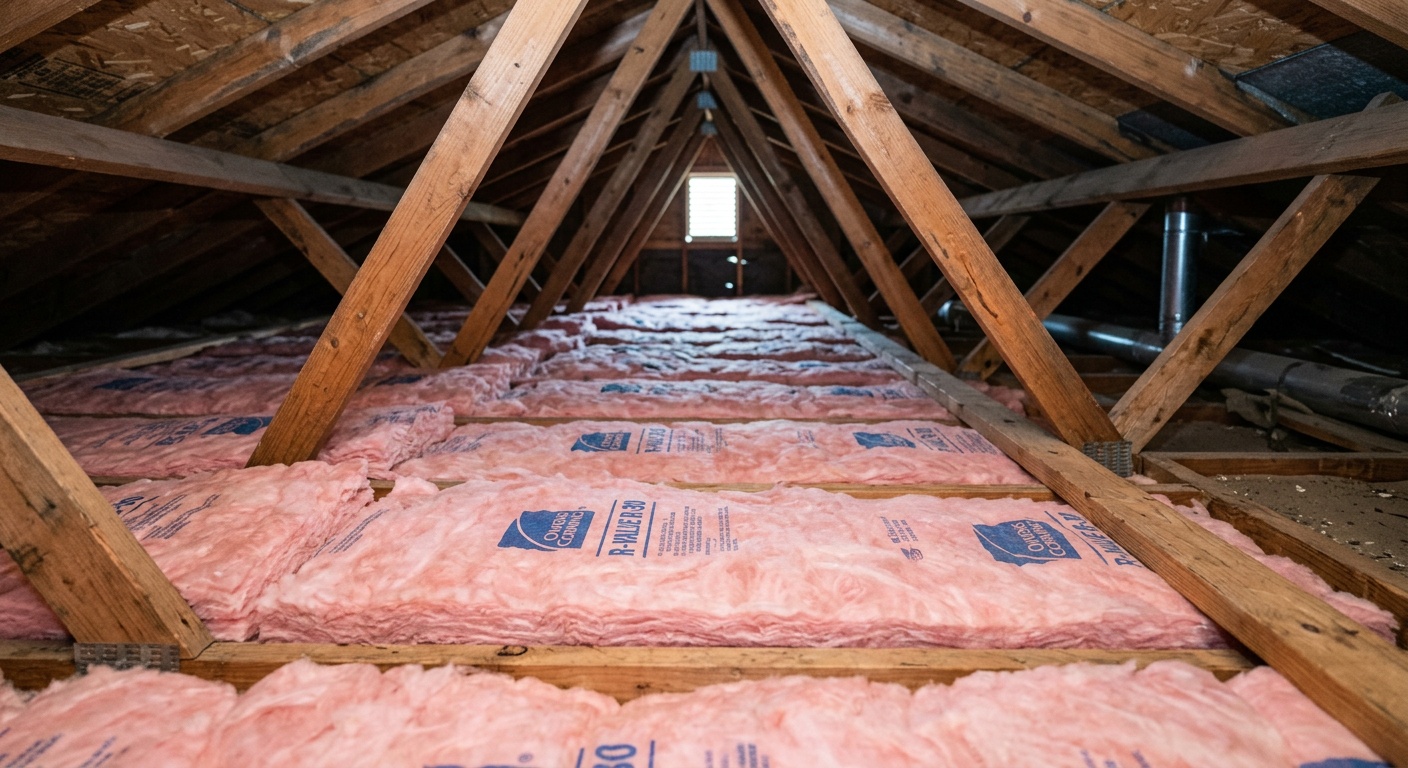
- Visible deterioration or thin insulation in the attic: Insulation that has settled, compressed, or is less than 10–11 inches deep (for fiberglass batts) is likely under-performing.
- Moisture stains or condensation on upper-floor ceilings: This can indicate both insulation gaps and ventilation failures working in combination.
Pro Tip: A simple infrared thermometer (under $30 at most hardware stores) can reveal dramatic temperature variations across your ceiling surface. Run it across the ceiling on a hot day — hot spots indicate exactly where insulation is missing or failing.
Real-World Impact: Case Studies and Energy Cost Data
Statistics are compelling, but real stories bring the problem to life. Let’s look at two scenarios that illustrate what inadequate roof insulation actually costs — in comfort and dollars.
Case Study 1: The Phoenix Family Home (2025 Retrofit)
A family in Phoenix, Arizona with a 2,200 sq ft two-story home built in 1994 was spending an average of $387 per month on cooling during summer 2025. Their upper floor consistently registered 14°F hotter than the ground floor, making the bedrooms nearly unusable during afternoon hours. An energy audit revealed their attic had original fiberglass batt insulation rated at R-13 — far below Arizona’s recommended R-38 to R-49.
After a professional spray foam upgrade to R-42 combined with added blown-in cellulose, their August 2025 energy bill dropped to $241 — a savings of $146 in a single month. The upper floor temperature differential shrunk to just 3°F. Their total project cost of $3,200 put them on track for a full return on investment within 22 months.
Case Study 2: The Minnesota Bungalow and the Ice Dam Battle
In Minneapolis, a homeowner dealt with persistent ice dams every winter for six years. In January 2025, an ice dam caused $8,400 in water damage to their upper-floor ceiling and walls. The root cause? Attic insulation of R-19 in a Climate Zone 6 region where R-49 to R-60 is recommended. Heat escaping through the roof was melting snow, which refroze at the cold eaves.
After installing R-49 blown-in cellulose and properly air-sealing all attic penetrations, the homeowner experienced zero ice dam formation through the winter of 2025–2026. Their heating bills dropped by approximately 22% year-over-year, and the upper floor became noticeably more comfortable — warmer in winter, cooler in summer.
These cases aren’t outliers. According to the Lawrence Berkeley National Laboratory’s 2025 Residential Buildings Study, proper attic insulation upgrades deliver an average energy cost reduction of 15–25% in homes with previously inadequate insulation, with payback periods typically ranging from 18 months to 4 years depending on climate and energy costs.
Insulation Types Compared: Which One Is Right for Your Roof?
Not all insulation is created equal, and choosing the wrong type for your specific situation can leave you with suboptimal results even after spending significant money. Here’s what you need to know about the primary options available in 2026.
Fiberglass Batts: The Classic Choice
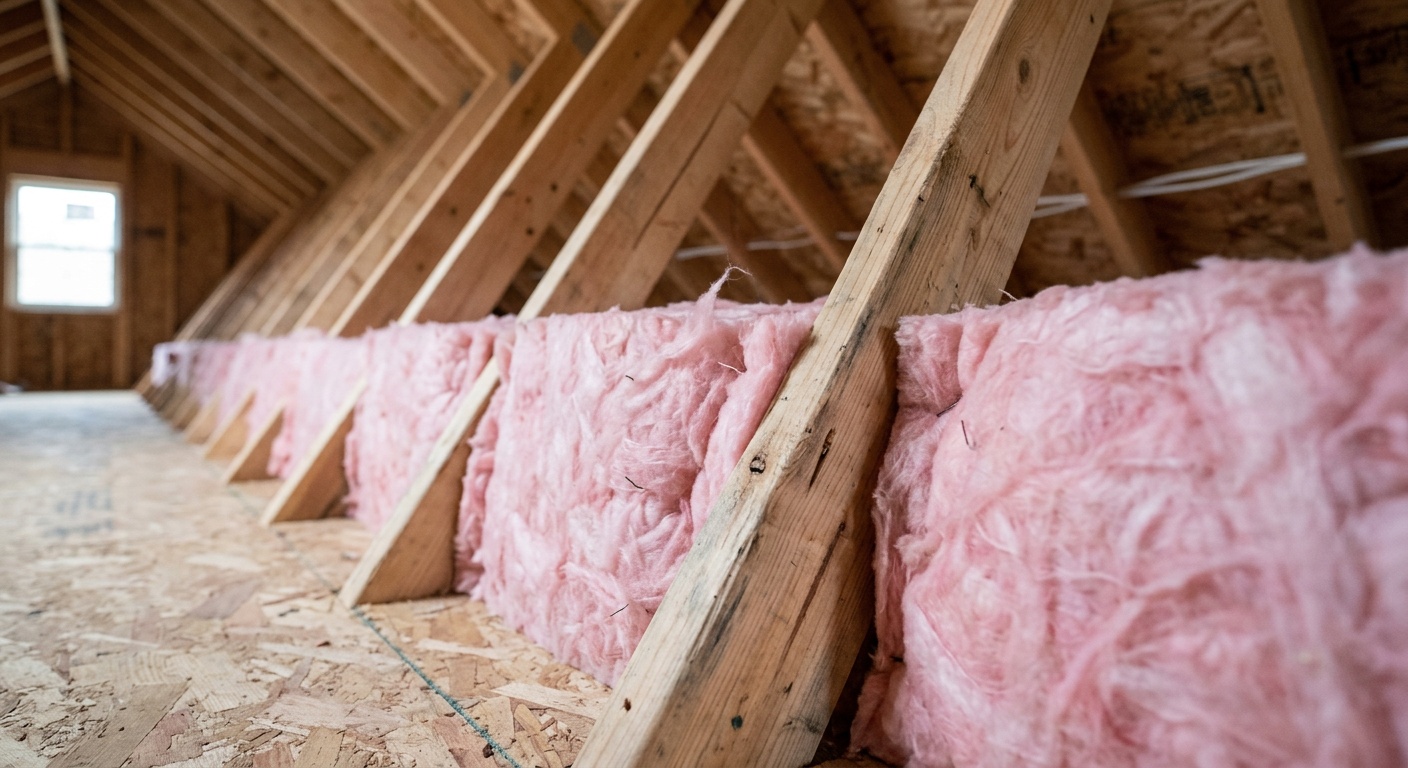
Fiberglass batts are what most people picture when they think of attic insulation — those pink or yellow fluffy rolls. They’re cost-effective and DIY-friendly, but they have a significant weakness: they must be installed perfectly to perform as rated. Any gaps, compression, or improper fitting around joists and obstructions dramatically reduces their effective R-value. In real-world conditions, fiberglass batts often perform at 60–80% of their rated R-value due to installation imperfections.
Blown-In Cellulose and Fiberglass: Better Coverage
Blown-in insulation — whether cellulose (made from recycled paper) or loose-fill fiberglass — conforms to irregular spaces and provides more uniform coverage than batts. It’s excellent for adding insulation on top of existing material and handles obstructions like pipes and wiring more effectively. Cellulose also has a naturally higher thermal mass, meaning it absorbs and releases heat more slowly — a genuine advantage in attics.
Spray Polyurethane Foam (SPF): The High-Performance Option
Spray foam, particularly closed-cell SPF, offers the highest R-value per inch (approximately R-6 to R-7 per inch for closed-cell vs. R-3.5 for fiberglass batts) and doubles as an air barrier — addressing both insulation and air sealing in one application. It’s the premium choice for serious performance gains but comes at 3–5 times the cost of blown-in alternatives. For homes with limited attic depth, spray foam is often the only way to achieve adequate R-values.
Rigid Foam Boards: Targeted Solutions
Rigid foam boards (polyisocyanurate, EPS, or XPS) are typically used in cathedral ceiling applications or when adding insulation above the roof deck during a re-roofing project. They provide excellent R-value in thin profiles and are moisture-resistant, making them ideal for specific structural situations where other insulation types can’t be used.
Heat Loss by Insulation Level: A Visual Breakdown
The following chart illustrates the percentage of upper-floor heat gain attributable to inadequate attic insulation at various R-value levels, compared to the recommended R-38 baseline for a moderate climate zone. Lower heat gain percentage = better performance.
Relative Heat Gain Through Roof by Insulation R-Value
*Relative heat transfer percentages based on DOE thermal resistance modeling data, 2025. Actual values vary by climate zone, roof type, and air sealing conditions.
The data tells a clear story: moving from R-19 (still common in millions of homes) to R-49 reduces heat transfer through your roof by nearly 75%. That’s not a marginal improvement — it’s transformative.
Practical Solutions and How to Implement Them
Understanding the problem is only half the battle. Here’s where we get into actionable territory — the specific steps you can take to fix upper floor heat problems caused by inadequate roof insulation.
Step 1: Conduct a Proper Assessment First
Before spending a dollar, you need an accurate picture of your current situation. Options include:
- DIY inspection: Access your attic with a tape measure. Measure the depth of existing insulation and identify the type. Compare against your climate zone’s recommended R-value using the DOE’s Zip Code Insulation Finder (available at energystar.gov).
- Professional energy audit: A certified energy auditor using a blower door test and thermal imaging camera will reveal air leaks, moisture issues, and insulation voids that are invisible to the naked eye. Cost: typically $200–$600 in 2026, and many utility companies offer subsidized or free audits.
- Utility company programs: In 2026, many U.S. utilities offer free or heavily discounted energy audits under state-mandated efficiency programs. Check your utility’s website — you may be leaving money on the table.
Step 2: Air Seal Before You Insulate
This is the most commonly skipped step, and skipping it is costly. Adding more insulation on top of existing air leaks is like putting a thick blanket over a window left open. Before adding any insulation, seal:
- Attic hatch or pull-down stair opening
- Top plates of interior walls
- Plumbing and electrical penetrations through the ceiling
- Recessed light fixtures (use IC-rated airtight covers)
- HVAC duct penetrations
Air sealing alone can reduce heating and cooling costs by 10–20% according to ENERGY STAR data from 2025. It’s high-impact, relatively low-cost work — typically done with caulk, foam sealant, and weatherstripping.
Step 3: Choose Your Insulation Strategy
Based on your audit results and budget, here’s a practical decision framework:
- Existing insulation is R-15 or below: Full replacement or significant top-up is needed. Consider blown-in cellulose or fiberglass over existing material after thorough air sealing.
- Existing insulation is R-19 to R-30: A top-up with blown-in insulation to reach R-49+ is typically the most cost-effective approach.
- Cathedral ceiling or limited attic depth: Spray closed-cell foam is often the only viable option for achieving meaningful R-values without rebuilding the ceiling assembly.
- Re-roofing in the near term: This is the perfect opportunity to add rigid foam above the deck for high performance without disturbing interior finishes.
Step 4: Address Roof Ventilation Simultaneously
Insulation and ventilation work as a team. Proper attic ventilation (typically a balanced combination of soffit intake vents and ridge exhaust vents following a 1:150 or 1:300 net free area ratio) ensures that any heat that does build up in the attic is actively expelled. A poorly ventilated attic traps heat and moisture, degrading insulation performance and shortening roof life.
In 2026, smart ventilation systems with temperature-triggered powered attic ventilators are increasingly cost-effective, with some models qualifying for federal energy efficiency tax credits under the extended Inflation Reduction Act provisions running through 2027.
Step 5: Consider Radiant Barriers for Hot Climates
In Climate Zones 1 through 3 (the hot-humid and hot-dry regions of the southern United States), a radiant barrier — a reflective foil material installed on the underside of roof rafters — can reduce attic temperatures by 25–35°F on peak summer days. The Florida Solar Energy Center documented in 2025 that homes with radiant barriers combined with proper insulation reduced cooling loads by an average of 16–17% compared to insulation alone in hot climates.
Comparative Table: Insulation Options for Upper Floor Heat Problems
| Insulation Type | R-Value per Inch | Avg. Cost per Sq Ft (2026) | Best Application | DIY Friendly? |
|---|---|---|---|---|
| Fiberglass Batts | R-2.9 – R-3.8 | $0.40 – $1.20 | Open attic floors, new construction | Yes |
| Blown-In Cellulose | R-3.2 – R-3.8 | $0.60 – $1.80 | Topping up existing insulation | Partial (rentable blower) |
| Closed-Cell Spray Foam | R-6.0 – R-7.0 | $3.00 – $6.50 | Cathedral ceilings, limited depth | No (professional required) |
| Rigid Foam Board | R-3.8 – R-6.5 | $1.50 – $4.00 | Above-deck during re-roofing | Moderate |
| Open-Cell Spray Foam | R-3.5 – R-3.8 | $1.50 – $3.00 | Unvented attic assemblies | No (professional required) |
Frequently Asked Questions
How do I know if my upper floor heat problem is caused by insulation or my HVAC system?
A useful diagnostic: if your upper floor is consistently 8°F or more warmer than your lower floor in summer, and your HVAC system runs continuously without closing that gap, both could be factors — but they’re interconnected. An undersized or poorly balanced HVAC system often appears to be the problem when, in reality, it’s being overwhelmed by excessive heat gain through an under-insulated roof. The best approach is to conduct an attic inspection first: if your attic temperature exceeds outdoor temperature by more than 20–30°F, heat gain through the roof is the primary driver. Fix the insulation before replacing or upsizing HVAC equipment, as you may find your existing system performs adequately once the thermal load is reduced.
Are there financial incentives available in 2026 for upgrading roof insulation?
Yes — and they’re significant. In 2026, U.S. homeowners can access the federal Energy Efficient Home Improvement Credit (25C), which provides a tax credit of 30% of insulation installation costs, up to $1,200 per year, for qualifying improvements including attic insulation and air sealing. Additionally, many state utility programs and state energy offices offer rebates of $100–$500 or more for insulation upgrades meeting minimum R-value thresholds. The Database of State Incentives for Renewables & Efficiency (dsireusa.org) is the most comprehensive resource for finding programs available in your specific state and utility territory. These incentives, combined with energy savings, make 2026 an excellent time to act.
Can I add more insulation on top of existing insulation, or does old insulation need to be removed first?
In most cases, you can add new insulation directly on top of existing material — but with important caveats. The existing insulation must be dry, free of mold, and not contaminated with asbestos (a concern in homes built before 1980). If your existing insulation is wet, moldy, or badly deteriorated, removal is necessary before adding new material. If it’s in good condition, you can add blown-in insulation over the top. However — and this is critical — you should never add fiberglass batts directly on top of existing batts without air sealing first, and you should never cover existing insulation with a vapor barrier that could trap moisture. For homes with vermiculite insulation in the attic (a potential asbestos hazard), have a sample professionally tested before disturbing it in any way.
Your Cooler Home Awaits: A 5-Step Action Roadmap
Here’s the truth: upper floor heat problems caused by inadequate roof insulation are one of the most solvable home comfort challenges you’ll face. The technology is proven, the financial incentives are strong, and the payback periods are real. The question isn’t whether to act — it’s how to act strategically.
Here’s your concrete roadmap to transform your upper floor from an oven into an oasis:
- Assess your baseline this week. Go into your attic, measure your current insulation depth, identify the type, and look up your climate zone’s recommended R-value at energystar.gov. Grab an infrared thermometer and scan your ceiling surfaces on a hot afternoon to locate hot spots.
- Schedule a professional energy audit. Contact your utility company to ask about free or subsidized audit programs. A professional audit with thermal imaging will confirm your diagnosis and identify hidden air leaks that could undermine any insulation upgrade.
- Get three competitive quotes from certified contractors. Look for contractors certified by RESNET, BPI, or ENERGY STAR. Ask specifically about the combination of air sealing plus insulation, and ask for projected R-values and estimated energy savings.
- Capture your federal tax credit and utility rebates. Before signing any contract, verify which specific improvements qualify for the 25C tax credit and any state rebates in your area. Have your contractor document the materials and R-values clearly for your tax records.
- Monitor and verify results. After the upgrade, track your monthly energy bills for a full year and compare against the prior year. Note the temperature differential between your floors. This data confirms your ROI and could inform further efficiency improvements.
As climate extremes continue to intensify through the latter half of the 2020s, the homes that remain comfortable and efficient will be those with robust thermal envelopes — and the roof is where that envelope matters most. Every degree of temperature differential between your floors, every hour your HVAC runs unnecessarily, and every dollar spent on excess energy is a direct result of a problem that has a clear, proven solution.
The bigger picture: Improving home insulation at scale is one of the most cost-effective pathways to residential decarbonization — and you get immediate personal benefit while contributing to a broader energy efficiency transformation. Your upper floor heat problem isn’t just a comfort issue. It’s an opportunity.
So here’s your challenge: which of these five steps will you take before the end of this week? The difference between a sweltering bedroom and a comfortable one might be closer — and more affordable — than you think.