How Attic Moisture Ruins Roofing Materials Over Time
Reading time: 14 minutes
That musty smell drifting down from your attic might be more than just an inconvenience — it could be the early warning signal of a roofing disaster quietly unfolding above your head. Attic moisture is one of the most underestimated threats to residential roofing systems, and in 2026, it remains the leading hidden cause of premature roof failure across North America.
Here’s the straight talk: Most homeowners don’t discover moisture-related roof damage until it’s already cost them thousands of dollars. By then, the shingles are curling, the decking is rotting, and the structural rafters may have developed mold colonies that require professional remediation. The good news? Understanding how moisture works its way through your attic — and what it does to your roofing materials — gives you the power to stop the damage before it spirals out of control.
Table of Contents
- The Mechanics of Attic Moisture
- How Moisture Destroys Roofing Materials
- Warning Signs You Shouldn’t Ignore
- Real-World Case Studies
- Moisture Damage Impact: By the Numbers
- Roofing Material Vulnerability Comparison
- Practical Solutions and Prevention Strategies
- Frequently Asked Questions
- Your Attic Defense Roadmap
The Mechanics of Attic Moisture
Before we can understand the destruction, we need to understand the source. Attic moisture doesn’t simply appear from nowhere — it travels, transforms, and accumulates through a series of well-documented physical processes. According to the National Roofing Contractors Association (NRCA), improper attic ventilation and air sealing contribute to over 40% of premature roof failures reported annually in 2026.
Where Does Attic Moisture Come From?
Moisture enters the attic through several distinct pathways, and most homeowners are surprised to learn that the majority originates inside the home rather than outside it.
- Air leakage from living spaces: Warm, humid interior air rises naturally and finds its way into the attic through gaps around light fixtures, plumbing penetrations, attic hatches, and electrical boxes. A typical 2,000-square-foot home can leak hundreds of cubic feet of humid air per hour.
- Bathroom and kitchen exhaust fans: When vented improperly — or worse, vented directly into the attic space rather than outdoors — these fans dump moisture-laden air right where you don’t want it.
- Roof penetrations and ice dams: In colder climates, liquid water from rain or melting ice can infiltrate through compromised flashing, cracked shingles, or around chimneys and skylights.
- Condensation from temperature differentials: When warm, humid air meets cold roof decking surfaces during winter months, it condenses into liquid water — a process that repeats nightly during cold seasons.
- Inadequate vapor barriers: Insulation installed without proper vapor retarders allows moisture migration from below to accumulate inside the attic cavity.
The Condensation Cycle: A Year-Round Problem
Many homeowners assume attic moisture is only a winter concern. In reality, it’s a year-round battle fought on two fronts. During winter, condensation forms when warm interior air meets cold decking. During summer, the dynamic reverses: hot, humid outdoor air can enter through soffit vents and condense on cooler surfaces inside an air-conditioned home’s attic. This cyclical wetting and drying process is arguably more damaging than constant wetness because it causes repeated swelling, shrinking, and stress fractures in roofing materials.
The relative humidity (RH) threshold for material degradation is critically important. Wood-based roofing components — including OSB decking and plywood sheathing — begin sustaining damage when exposed to RH levels above 70% for extended periods. According to building science research published by the Building Science Corporation in 2025, attics in humid climates like the southeastern United States regularly record RH levels exceeding 80% during summer months without proper ventilation systems in place.
How Moisture Destroys Roofing Materials
This is where the real damage story unfolds. Each roofing component responds differently to sustained moisture exposure, and understanding that breakdown helps prioritize what to inspect and protect first.
Roof Decking: The Foundation Crumbles First
The roof deck — typically oriented strand board (OSB) or plywood sheathing — is the structural layer to which all other roofing materials attach. It’s also the most vulnerable to moisture because it’s wood-based and directly exposed to attic air from below.
When roof decking absorbs moisture repeatedly, several things happen in sequence:
- Swelling and delamination: OSB and plywood expand when wet and contract when dry. Over dozens of cycles, the layers separate and the structural integrity collapses.
- Soft spots: Prolonged saturation causes wood fibers to break down, creating soft, spongy areas that can’t support the weight of shingles — or a roofing contractor walking across the roof.
- Mold and fungal rot: Once moisture content exceeds 19% by weight (the recognized threshold for fungal growth), mold and wood-rotting fungi colonize the decking. Species like Serpula lacrymans (dry rot fungus) can reduce structural timber strength by up to 80% within 18 months of colonization.
- Fastener failure: Moisture causes roofing nails embedded in degraded wood to lose holding power. This directly compromises shingle attachment, making the roof vulnerable to wind uplift.
Asphalt Shingles: Premature Aging and Granule Loss
Asphalt shingles are the most common roofing material in North America, covering approximately 75% of residential roofs as of 2026. They’re designed to shed water efficiently, but sustained moisture exposure from below — through the decking — and from above — through inadequate drainage — accelerates their deterioration dramatically.
Here’s what moisture does to asphalt shingles specifically:
- Granule loss: Moisture infiltration beneath shingles softens the asphalt layer, causing the protective mineral granules to loosen and wash away with rainfall. Granule loss exposes the raw asphalt to UV radiation, accelerating cracking and brittleness.
- Curling and cupping: When the underside of a shingle absorbs more moisture than the top surface, differential expansion causes the edges to curl upward (cupping) or the center to arch (clawing). Curled shingles are highly susceptible to wind damage and create channels for water entry.
- Algae and moss growth: Persistent moisture creates an ideal environment for blue-green algae (Gloeocapsa magma) and moss. While algae causes primarily cosmetic staining, moss is structurally damaging — its root systems physically lift shingles, breaking the adhesive seal strips and allowing water penetration.
- Blistering: When moisture trapped within the shingle body heats up and vaporizes, it creates pressure blisters that rupture the surface layer and create entry points for further water infiltration.
Rafters and Structural Framing: The Silent Structural Threat
While decking and shingles draw the most attention, the real long-term catastrophe often involves the structural rafters and ridge board. These components, typically dimensional lumber (2×6, 2×8, or engineered lumber), can sustain moisture damage for years before any outward signs appear at the ceiling level below.
Structural lumber affected by chronic moisture exposure loses bearing capacity progressively. A rafter that has sustained dry rot along 30% of its cross-section may still appear visually intact but carry only a fraction of its designed load capacity. In severe cases, this creates genuine structural collapse risk — particularly under snow load in northern climates.
In 2025, a well-publicized insurance case in Minnesota involved a homeowner who filed a claim after partial roof collapse following a heavy snowfall. Investigation revealed that chronic attic condensation over approximately 7 years had degraded nearly 40% of the rafter system — damage that had never been visible from inside the living space below. The total remediation cost exceeded $87,000.
Warning Signs You Shouldn’t Ignore
Catching moisture damage early is the difference between a $500 repair and a $15,000 replacement. Here are the red flags that demand immediate attention:
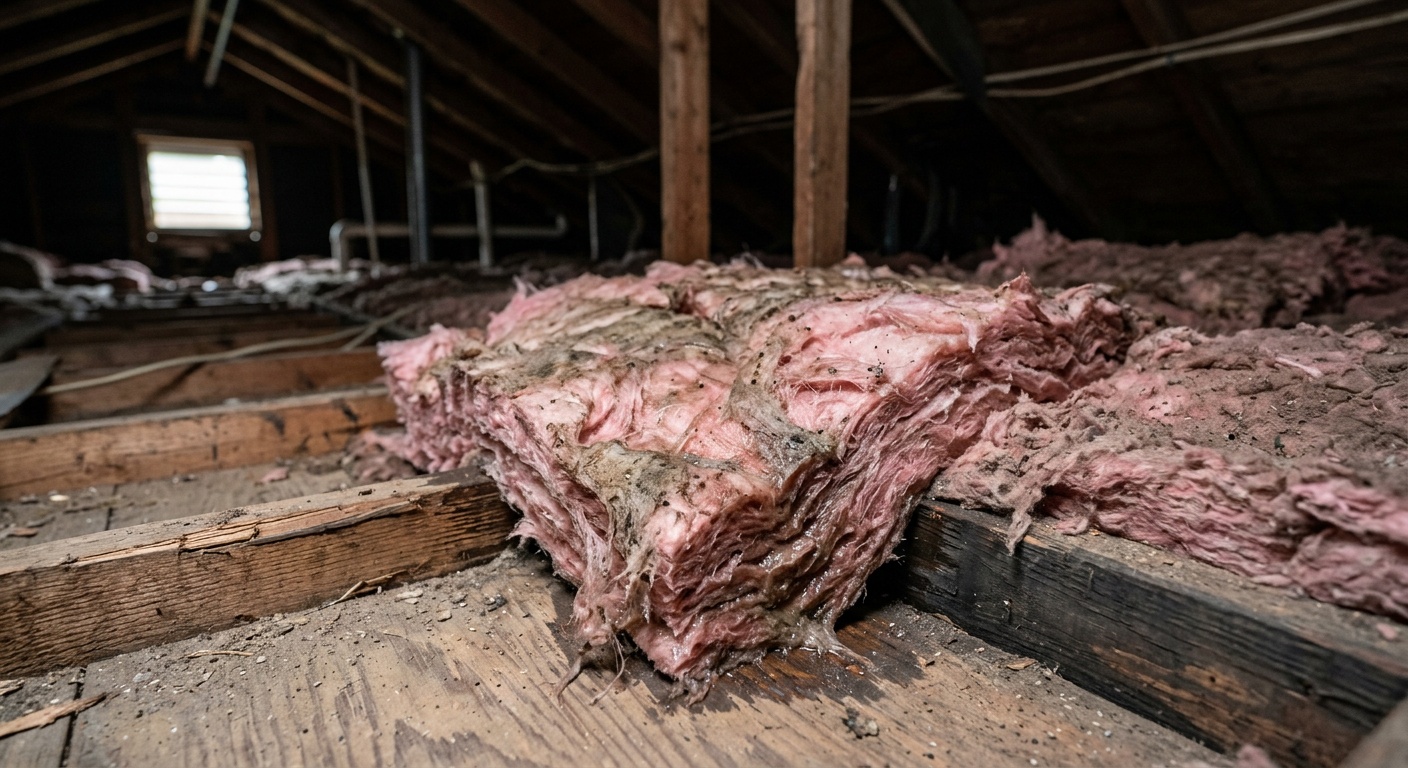
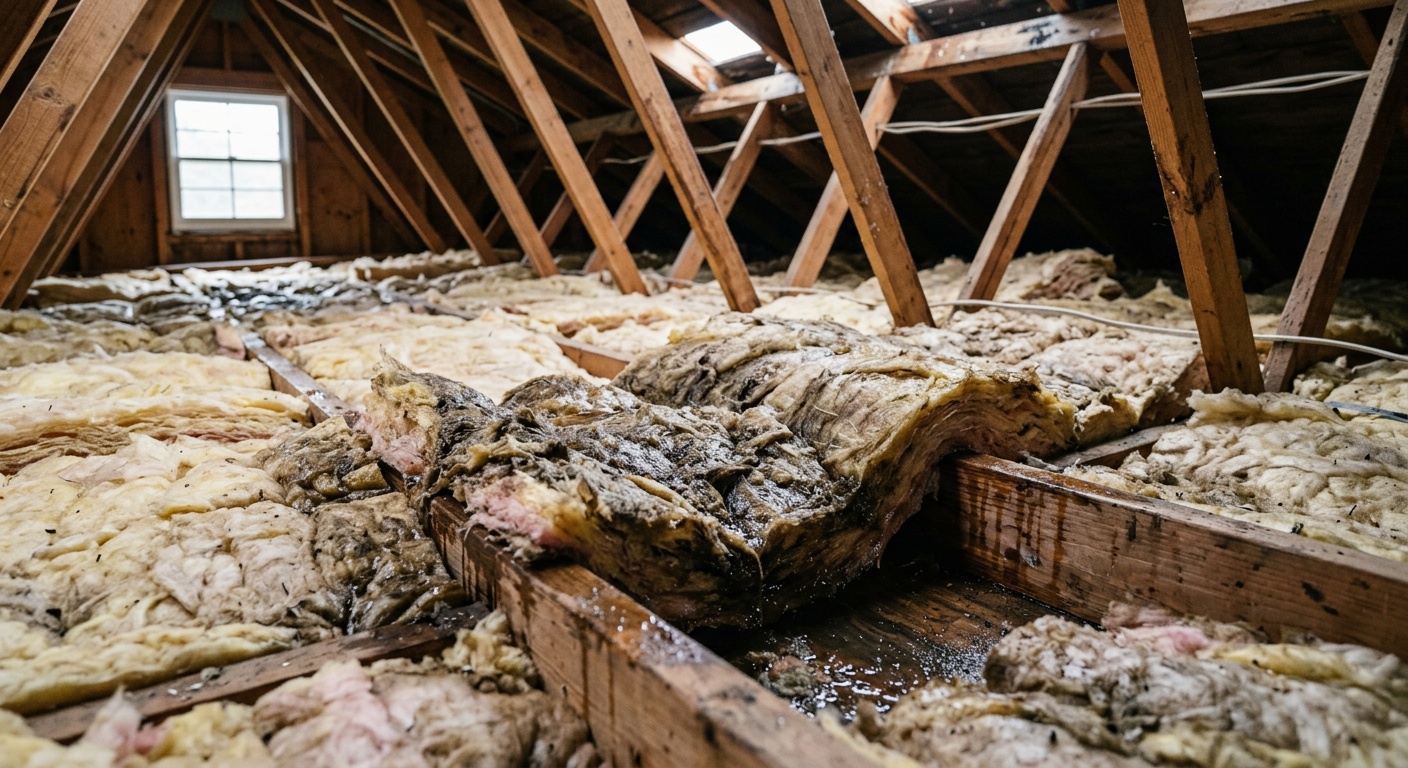
- Dark staining on attic sheathing — black or grey discoloration on the underside of roof decking indicates mold growth or repeated condensation.
- Frost on attic surfaces in winter — visible frost means warm, humid interior air is reaching cold surfaces and freezing on contact. When temperatures rise, that frost melts and soaks directly into the wood.
- Musty odors — even without visible mold, a persistent musty smell is a reliable indicator of moisture-related microbial activity.
- Curling or buckling shingles visible from ground level or during routine inspection.
- Higher-than-expected energy bills — saturated insulation loses R-value dramatically. Wet fiberglass insulation can lose up to 40% of its thermal resistance, causing heating and cooling systems to work harder.
- Ice dams forming at eaves — a direct indicator that attic heat loss is uneven, pointing to inadequate insulation or ventilation.
- Daylight visible through roof boards — if you can see light through gaps in the decking from inside the attic, structural degradation is already advanced.
“The attic is the canary in the coal mine for your entire roofing system. If you’re not inspecting it at least twice a year, you’re flying blind on one of your home’s most expensive components.” — Dr. Joseph Lstiburek, Principal, Building Science Corporation, 2025 Building Enclosure Conference
Real-World Case Studies
Case Study 1: The Pacific Northwest Ranch Home
In Portland, Oregon — one of the dampest climates in the continental United States — a homeowner discovered in early 2026 that her 12-year-old asphalt shingle roof required complete replacement, despite the manufacturer’s 30-year warranty. Investigation revealed that bathroom exhaust fans on both the main floor and master bath had been improperly vented into the attic space since the home’s original construction in 2014.
Over 12 years, these fans had introduced an estimated 15–20 liters of moisture per day into the attic during high-usage periods. The OSB decking showed widespread delamination, 65% of the attic insulation was saturated and had become a medium for mold growth, and more than a third of the rafters showed fungal discoloration requiring partial replacement. Total remediation cost: $34,200. The warranty claim was denied because the damage was deemed “moisture-related” rather than a manufacturing defect.
Key lesson: Always verify that exhaust fans are vented to the exterior — not just into the attic — and check annually that ductwork connections haven’t separated.
Case Study 2: The Georgia New Build Surprise
A newly constructed home in suburban Atlanta, completed in 2023, began showing signs of moisture damage within just 18 months of occupancy. The homeowners noticed dark staining along the ridge board and soffit areas. A building diagnostics team discovered that the builder had installed a continuous vapor barrier on the warm side of the attic insulation, which — combined with an undersized ridge vent — created a sealed environment where summer humidity had nowhere to escape.
This case illustrates a crucial point: moisture damage isn’t exclusively an old-home problem. Improper construction details in new builds can create conditions for rapid deterioration. In this instance, the builder was required to install a balanced ventilation system (adding soffit vents and upgrading the ridge vent) and replace the affected decking sections at no cost to the homeowner under new construction warranty provisions. Total contractor repair value: $11,800.
Moisture Damage Impact: By the Numbers
The following chart illustrates the percentage of roofing lifespan lost due to various levels of unaddressed attic moisture exposure, based on 2025 industry research from the NRCA and independent building science studies.
Estimated Roof Lifespan Reduction by Moisture Severity
Source: NRCA Industry Research & Building Science Corporation, 2025
Roofing Material Vulnerability Comparison
Different roofing materials respond very differently to moisture exposure. This table provides a practical comparison to help homeowners understand their specific risk profile:
| Roofing Material | Moisture Vulnerability | Primary Damage Type | Average Lifespan Impact | Recovery Potential |
|---|---|---|---|---|
| Asphalt Shingles | High | Curling, granule loss, blistering | Up to 40% reduction | Low (replacement typical) |
| Wood Shingles/Shakes | Very High | Rot, splitting, moss penetration | Up to 60% reduction | Very Low |
| Metal Roofing | Low–Moderate | Corrosion at fasteners, panel separation | Up to 15% reduction | Moderate (targeted repair) |
| Clay/Concrete Tile | Low | Underlayment degradation, freeze-thaw cracking | Up to 20% reduction | High (underlayment replacement) |
| Synthetic/Composite | Low | Minimal; primarily fastener and seam risk | Up to 10% reduction | High |
Practical Solutions and Prevention Strategies
Here’s where we shift from problem identification to actionable solutions. The good news is that most attic moisture problems are entirely preventable and, when caught early, manageable without catastrophic expense.
1. Optimize Attic Ventilation
The gold standard for residential attic ventilation follows the 1:150 rule — one square foot of net free ventilation area for every 150 square feet of attic floor space — with a balanced distribution between low intake (soffit vents) and high exhaust (ridge vents). An imbalanced system, with too much exhaust and too little intake, can actually draw warm interior air into the attic rather than expelling it.
In 2026, the most effective ventilation approaches include:
- Continuous soffit and ridge vent systems — provide uniform airflow across the entire attic rather than point-source ventilation that leaves dead zones.
- Solar-powered attic fans — useful as supplemental ventilation in extremely hot or humid climates, though they should not replace passive ventilation systems.
- Baffles and rafter channels — ensure insulation doesn’t block soffit vents, which is one of the most common installation errors in residential construction.
2. Air Seal the Attic Floor Aggressively
Ventilation alone cannot solve an air-sealing problem. If warm, humid interior air is freely migrating into the attic, no amount of exhaust capacity will keep RH levels under control. Prioritize sealing:
- Top plates of interior walls
- Electrical and plumbing penetrations through the ceiling
- Recessed lighting fixtures (use sealed, IC-rated fixtures)
- Attic hatch perimeters with weatherstripping and rigid insulation covers
- Chimney chases and flue surrounds
Spray polyurethane foam (SPF) applied by a certified contractor is currently the most effective air-sealing solution for complex attic floors, capable of achieving very low air leakage rates when properly installed.
3. Redirect All Exhaust Fans to the Exterior
This is non-negotiable. Every bathroom, kitchen, laundry, and dryer exhaust fan in the home must terminate at an exterior wall cap or roof cap — never into the attic space. In 2026, building codes in all U.S. jurisdictions require exterior termination, but millions of existing homes were built or renovated before these requirements were universally enforced.
Pro Tip: Use rigid metal duct for exhaust fan terminations, not flexible plastic duct. Flexible duct sags over time, creates moisture traps, and frequently disconnects from fittings without the homeowner’s knowledge.
4. Install a Dehumidistat-Controlled Ventilation System
For homes in particularly humid climates — the Gulf Coast, Pacific Northwest, Mid-Atlantic, or Upper Midwest — consider installing a dehumidistat-controlled exhaust fan in the attic that activates automatically when RH exceeds a set threshold (typically 60%). These systems, available for $200–$500 installed in 2026, provide an intelligent backup layer of moisture control during periods when passive ventilation is insufficient.
5. Inspect Twice a Year — No Exceptions
Schedule attic inspections in late fall (before winter condensation season begins) and late spring (after winter moisture has had a chance to accumulate). Bring a flashlight, a moisture meter (available for under $30 at hardware stores), and look systematically at decking, rafters, insulation, and all vent terminations. Document your findings with photos. This 30-minute habit can save tens of thousands of dollars over the life of your home.
Frequently Asked Questions
How do I know if my attic moisture problem has already damaged my roofing materials?
The most reliable method is a combination of visual inspection and moisture meter readings. In your attic, use a pin-type moisture meter to test the roof decking in multiple locations — readings above 19% moisture content (by weight) indicate conditions where fungal growth and structural degradation are likely already occurring. Visually, look for dark staining on sheathing, soft spots when pressing on decking, visible mold (often grey, black, or green fuzzy growth), and frost deposits in winter. If you’re not comfortable doing this yourself, a certified home inspector or building diagnostics professional can perform a comprehensive assessment for $200–$500, which is money extremely well spent compared to the cost of undetected damage.
Can I just add more ventilation to fix an existing moisture problem, or do I need to address the damaged materials first?
Both issues must be addressed, but the sequence matters. If mold or rot is already present, adding ventilation alone will not reverse the biological damage — mold doesn’t die simply because conditions improve; it goes dormant and can reactivate. The correct approach is: (1) identify and eliminate all moisture sources first, (2) remediate any existing mold or rot with appropriate treatment or material replacement, and (3) then optimize ventilation to prevent recurrence. Attempting to ventilate your way out of an active moisture problem without fixing the sources is like bailing a leaking boat without patching the hole.
Does homeowner’s insurance typically cover attic moisture damage to roofing materials?
In most cases, standard homeowner’s insurance policies in 2026 do not cover moisture damage that results from long-term neglect, inadequate maintenance, or gradual deterioration — which covers the vast majority of attic moisture scenarios. Coverage typically applies only to sudden, accidental water damage (such as a pipe burst or storm-driven water intrusion) rather than the slow degradation caused by condensation or humidity. This means the financial burden of repairing moisture-damaged roofing systems falls almost entirely on the homeowner. Some specialty policies and home warranties offer broader coverage, so review your specific policy documents and consult your insurance agent. The takeaway: prevention is dramatically cheaper than remediation, and the insurance safety net you assume is there may not exist for this type of damage.
Your Attic Defense Roadmap: Protect Your Investment Starting Today
Here’s the fundamental truth about attic moisture damage: it is almost always a slow-moving, preventable disaster. The roof over your head is likely the single most expensive component of your home’s structure — in 2026, full roof replacements on a typical 2,000-square-foot home range from $12,000 to $28,000 depending on material choice and regional labor costs. Protecting that investment costs a fraction of replacing it.
As climate patterns continue shifting — with more intense humidity events, longer shoulder seasons, and greater temperature swings recorded across North America in 2025 and 2026 — the pressure that moisture places on roofing systems is only increasing. The homeowners who will fare best are those who treat their attic not as unused dead space but as a critical mechanical zone that requires active management.
Here are your five immediate next steps:
- This week: Access your attic with a flashlight and look for the warning signs outlined in this article. Take photos and note any staining, soft areas, or odors.
- Within 30 days: Purchase or borrow a moisture meter and take readings from the roof decking in at least 10 locations. Log the results.
- This season: Verify that every exhaust fan in your home terminates at an exterior vent cap. Have a contractor fix any that don’t.
- Before next winter: Assess your attic ventilation balance — measure soffit and ridge vent free area and compare to the 1:150 standard for your attic floor area.
- Annually: Schedule a professional attic and roof inspection every fall, particularly if your home is more than 10 years old or located in a high-humidity climate zone.
The most valuable insight from everything covered here is this: moisture damage compounds silently. What costs $500 to fix today costs $5,000 next year and $50,000 in five years. The question isn’t whether you can afford to take attic moisture seriously — it’s whether you can afford not to.
So here’s your challenge: When did you last actually look inside your attic? If you can’t answer that question confidently, your most important home maintenance task isn’t a renovation or an upgrade — it’s a flashlight and an afternoon. Your roof is counting on you.